|
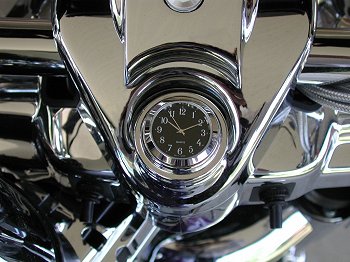
Although not new to the market, a company division has netted the
Riders Passion Road King Clock its new name, and it continues with its
tradition of ultra high quality fit and finish.
www.riderspassion.com
Wanna protect that fork lock from the weather? Wanna keep up with
closing time at your favorite hang spot? Wanna give that King some fine,
well earned jewelry? Check out
Riders Passion Fork Lock Cover Clock.
Weatherproof time piece and warranted for five years by Seiko. A great
product made just for your bike at a great price.
 |
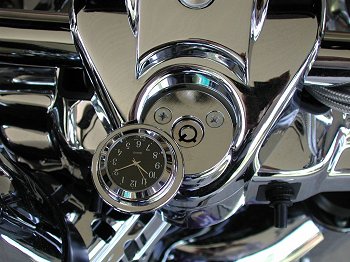 |
Installation of Riders Passion Clock is as simple as it gets, and normally only requires a fingernail and a phillips head screwdriver. Simply pop off the fork lock cover with your fingernail, then remove the two exposed phillips screws, open the clock cover and install to the fork lock, using the two screws. Done! (Be sure to check out the Key alteration at the bottom of this page)
HOWEVER! For some strange reason, not all Road Kings are created equal, so you may be one of a few owners that has an oddball nacelle cover which doesn't allow the Riders Passion Clock to sit directly over the fork lock, causing the holes not to line up for the screws. (I think this may be due to randomly thicker plating on some nacelle caps, or possibly two different molds being used in the production process).
If you happen to be one of the unlucky ones, don't panic! The clock
will still fit just fine with only a small change in installation
technique, using the old cover trim as a hidden spacer.
You'll need a drill and a 3/16 or 1/4" drill bit, and you'll need to
make a trip to your local Ace hardware store and purchase a pair of
10-24 x 3/4" flat head screws (get stainless ones, they're only 30
cents!). You may have trouble finding phillips heads, but flat heads
will work just fine.
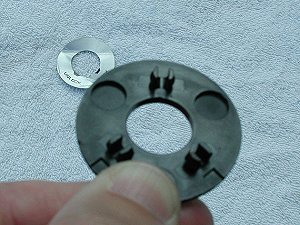
In order to use the old trim ring as a spacer, you will need to drill two holes in it. This is much easier to do if you peel off the aluminum decal first, so you'll only be drilling through plastic (its all going to be hidden anyway). Just dig a fingernail under the edge of the decal
and peel it up (its very slightly recessed at the edge). |
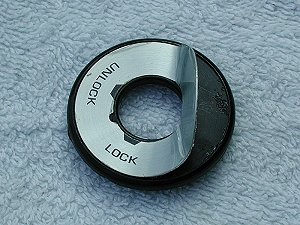 |
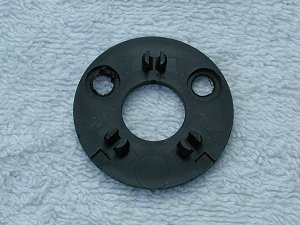
When you flip
the trim ring over, you can see that there are two depressions
in the plastic. These depressions are directly over the mounting
screw locations for the clock and nacelle cap. This is where you
will drill. |
|
It is not
necessary to drill the entire depression out. 3/16 to 1/4" holes
are plenty. Just center the drill bit in the depressions. |
|
| Now, with the screws removed from the nacelle cap, flip the trim ring over and snap it back in place on the cap, open the Riders Passion Clock, and install with the longer screws that you bought. | |
|
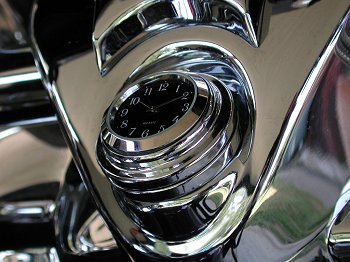
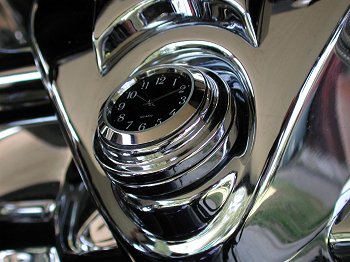
The two photos below show the installation of the clock with and
without the trim ring spacer Photo on right has the spacer. |
|
|
|
Regardless of
which installation your bike requires, you will need to slightly
alter your barrel lock key to accommodate the additional depth of the clock. Simply
file or grind off a small portion of the lower square edge of
the key so it won't bottom out on the clock base when you insert
it into the lock. This is best and most easily accomplished with a Dremel tool and cutoff wheel If your installation requires the spacer, you will need to increase the grind area to 1/4" or better to allow for the depth of the spacer. |
|
Here's a photo of a friend's Screaming Eagle Road King
with white faced gauges and white Riders Passion Clock.
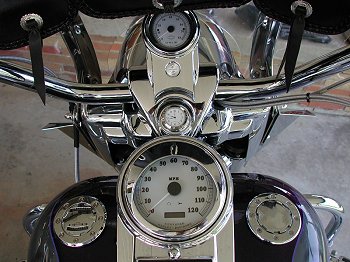
(Click the photo for 800x600 full screen shot)
|
Many thanks to my friend Scott Biccum |
