|
Harley's Touring bikes come
pre-wired for an auxiliary add-on accessory, to work with
either the ignition switch, the auxiliary nacelle/fairing
switch (depending on model) or the brake light circuit.
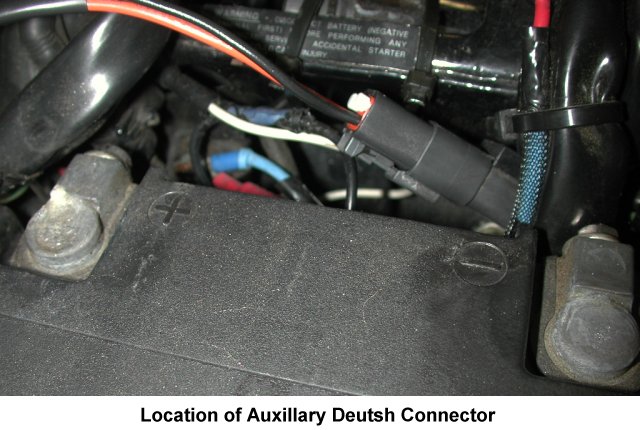
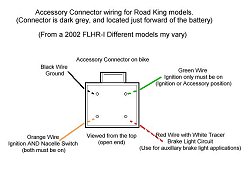
To gain easy access to this auxiliary circuit, Harley has
added a square Deutsch connector (dark grey) in the space
just in front of the battery. I believe this connector is
intended as a tour pak feed, as it contains lighting,
braking, and auxiliary circuits all in one plug.
They sell a "Supplementary 12 Volt Power Point"
kit, to allow use of this connector with a common
cigarette lighter receptacle. Only problem is, this
receptacle is designed to be mounted into the side panel
of the bike, leaving the receptacle and anything plugged
into it exposed to the weather and a passenger's leg.
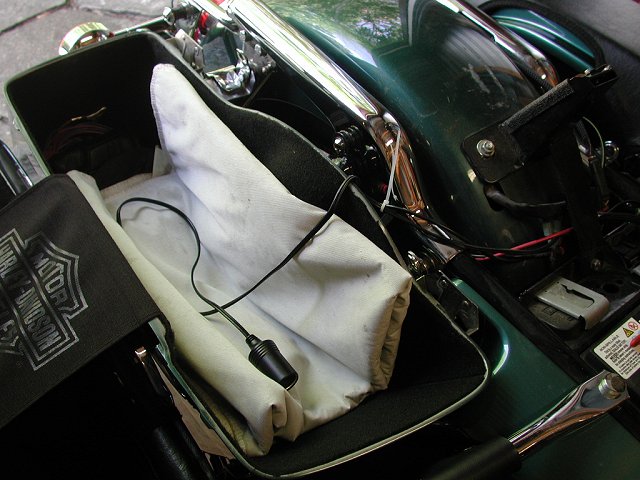
If you prefer a more remote and secure place for the
receptacle, here's an easy modification that will allow
you to place the receptacle into either saddlebag, or
into a tour pak if you prefer. Plug your phone in and
charge it in a protected area while you ride. Similar
procedures can of course, be used to achieve the same
results with a mounted receptacle in a different location
on the bike, but for the purpose of this page, we'll keep
it simple.

|
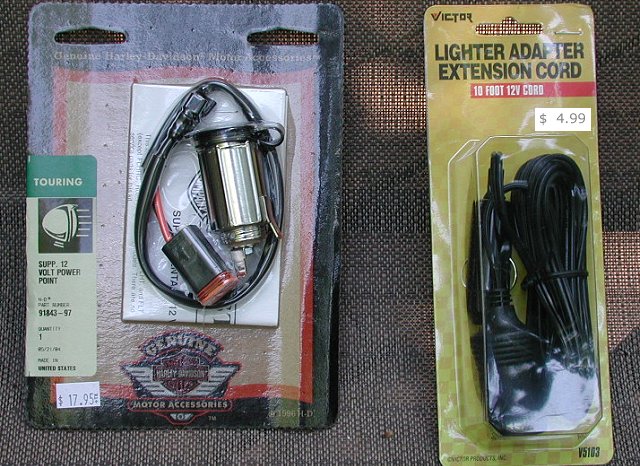
1: Get the
stuff!
First of all, pay a visit to your local HD
dealer and purchase the Power Point accessory
kit, Part # 91843-97. Then stop by your local
Auto discount store and purchase a common six
foot or ten foot Lighter Adapter Extension Cord.
|
 |
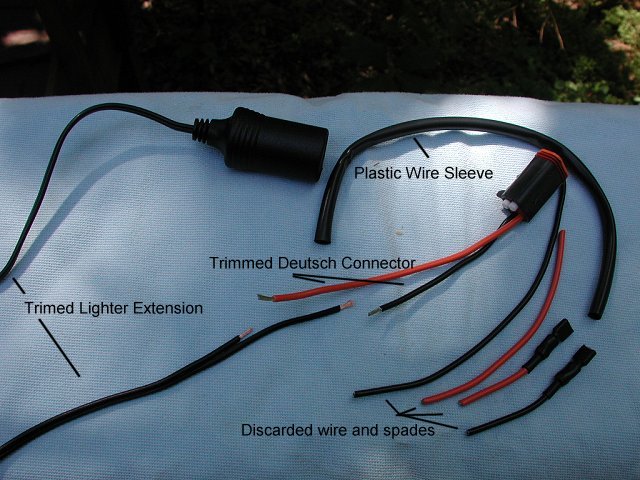
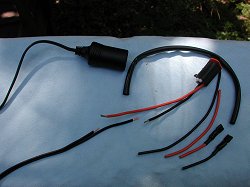
2: Trim the
fat!
Pull out your wire cutters and cut the lighter
extension cord to a total length of 56 inches
from the FEMALE end (the hollow end) and discard
the remaining wire and male end, as these will
not be used. Cut the lighter extension wires so
that one wire is 1.5 to 2 inches shorter than the
other, and strip the ends for soldering.
Now, cut the two spade connectors off the Harley
Power Point wire kit, so you can slip off the
protective plastic sleeving. Slide that sleeving
up the lighter extension wire before you forget
about it!! Now lay the Harley kit wiring
alongside the staggered lighter extension wiring,
and cut the Harley wiring to match the stagger,
and strip the ends. The orange Harley Power Point
wire is the hot wire, black is ground. Discard
the spade connectors and the excess wire that was
removed.
|
 |
|
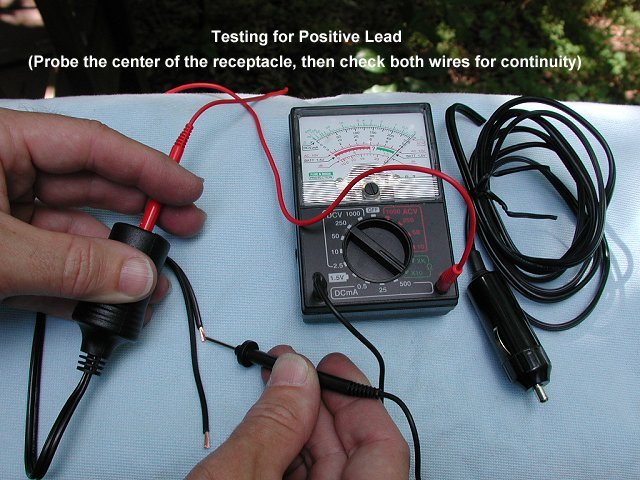
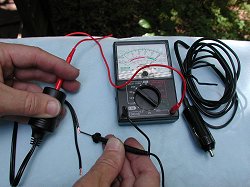
3:
Find the juice!
You will need to determine which of the two wires
is the "hot" lead to the center contact
point inside the female receptacle. This can
easily be done with a circuit tester or ohm meter.
Just probe one lead to the center of the
receptacle and touch the other lead to each of
the wire ends until you read continuity. On my
particular lighter extension, the hot wire is the
one with writing all along its length, but its a
good idea to test anyway to prevent problems in
the future. I cut my hot wire short and left the
ground wire long.
|
|
4: Poke it with a hot iron!
Next, slip a short length of heat shrink
tubing up onto each Harley wire (you should
already have the protective plastic sleeving on
the lighter extension wire), and solder the ends
to the lighter extension wires, then slip the
heat shrink over the joint and heat with a candle
to shrink. Finally, slip the plastic protective
sleeving over the whole thing and you're done
building your own lighter kit.
|
|
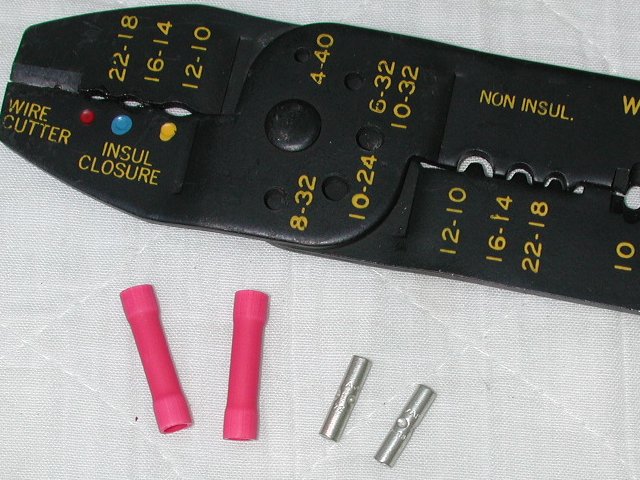
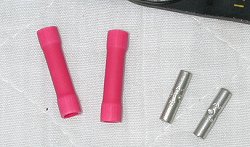
Please Note:
If you ain't into soldering, crimp on butt connectors are
available from most auto supply stores for a quick and easy
alternative to the hot iron. They work just as well, but their
size can make them a bit of a tight fit for the outside
protective sleeving. Just make sure you get the insulated type
(on the left) or use heat shrink over bare ones. |
 |
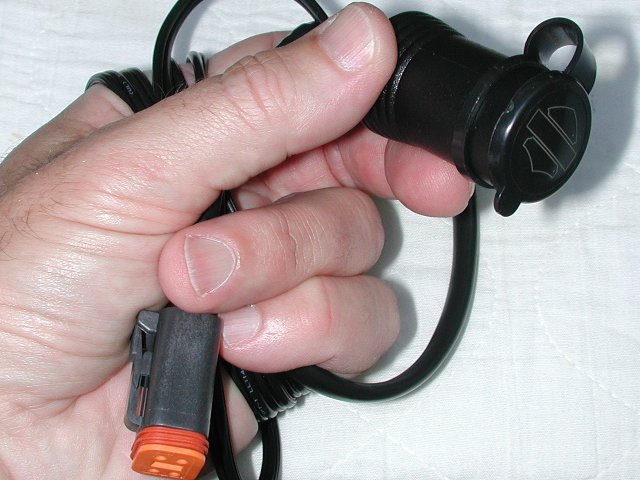
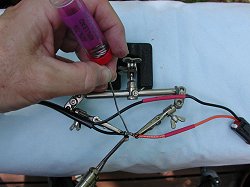
5: Pinups!
The bike half of the Deutsch connector
actually has four pins inside, allowing you to
select your own mode of operation for your
accessory, depending on how you place the two
pins in the kit half of the connector.
|
|
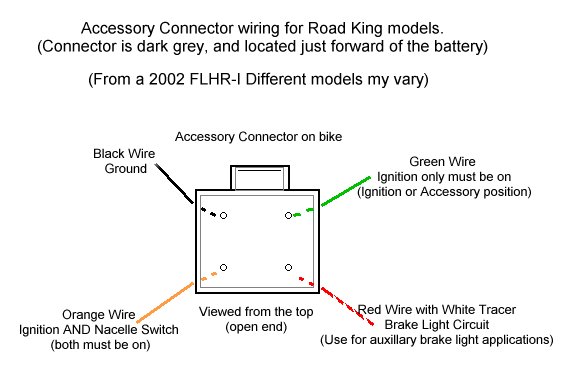
6: Pop the top!
Your Power Point kit should be pre-set to
function with both the ignition switch AND the
nacelle/fairing accessory switch in the ON (or
"Accessory" for the ignition) position.
You also have the option of making your accessory
function with just the ignition switch (independently
of the nacelle/fairing switch), or have it
function with the brake light circuit. See the
wiring diagram for how your bike plug is wired,
and the two photos for wire position/power
options for your power point kit connector. (brake
light circuit not shown)
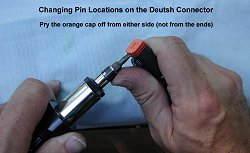
To change the pin position on your kit connector,
first pry off the orange top to the connector by
pushing it up from the sides with a flat
screwdriver. Don't pry from the ends or you will
break it.
|
|
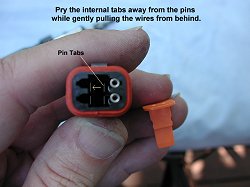
7: Go deep!
Next, reach inside the hollow center of the
connector and pry the tab away from the pin while
pulling the wire from the back of the connector.
Then just slip the pin in whatever position you
want, and it will snap into place. Replace the
orange cap and you're done. Your kit connector
comes with white plastic plugs to fill the unused
spaces for better weather protection.
|
|
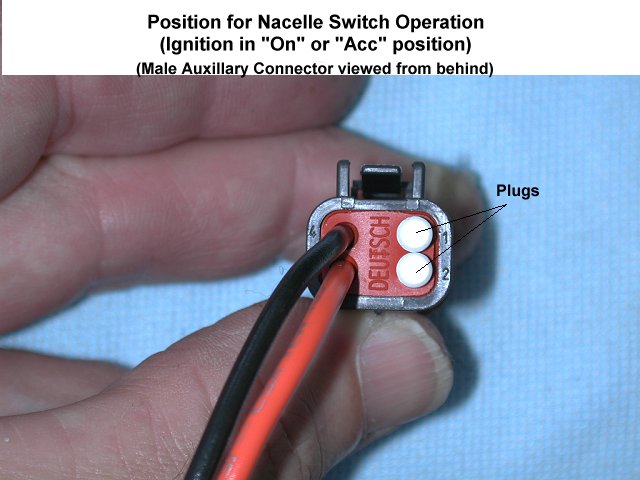
8: Nacelle Switch AND Ignition!
This wire/pin position (viewed from the
backside of the kit connector) is the default
position of the purchased kit. Both the ignition
and nacelle switches have to be on (or in
accessory position) in order to power the
receptacle. Note the orientation of the connector
lock.
|
|
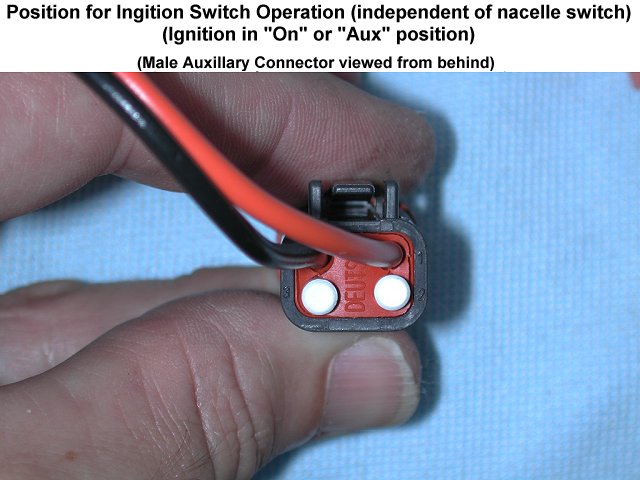
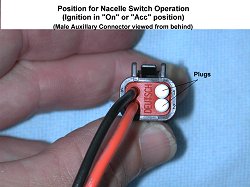
9: Ignition Only!
This wire/pin position (viewed from the
backside of the kit connector) allows only the
ignition switch have to be on (or in accessory
position) in order to power the receptacle. The
nacelle switch is not used and has no effect on
power to the receptacle.
Note the orientation of the connector lock.
|

|
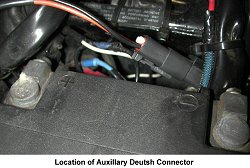
10: Get Connected!
Connect the kit plug to the bike plug located
just in front of the battery,.
|
|
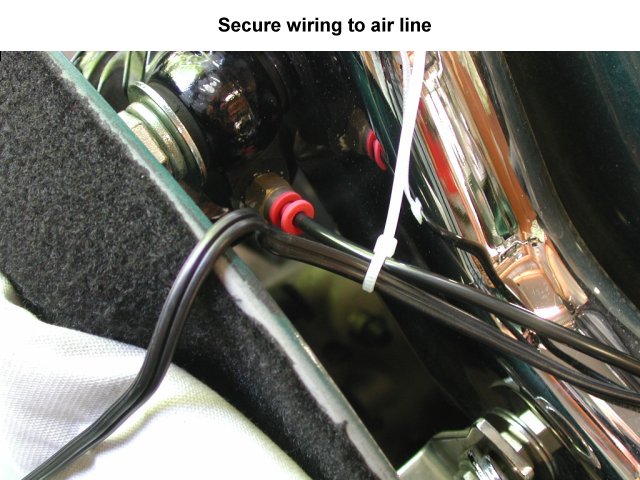
11: Tie me up!
Route the wire along the shock absorber air
lines, and lightly secure it with a couple of
small wire ties, lay it across the lip of the
saddlebag or tour pak and close the saddlebag.
The foam rubber lip seal of the saddlebag/tour
pak has enough "squish" to it to allow
the wire to pass under with no harm to either the
wire or the saddlebag, and still maintain a good
weatherproof seal when closed.
(white wire ties were used for the photograph for better
clarity)
|

|
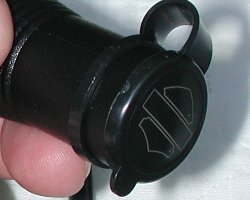
|
12: Finish me
off!
Slip the Power Point protective cap off the
supplied bare metal lighter receptacle and
stretch its retaining ring over the new vinyl
covered receptacle to finish off the project. |
 |
|
Please Note:
The bike half of the auxiliary connector will not supply a full
time hot lead. The ignition switch will have to be on or in the
accessory position to supply power to the connector. If you need
full time power, then you should simply tap the lighter
extension chord into any full time hot lead (such as the main
circuit breaker in front of the battery or the battery terminals
themselves) and incorporate an inline fuse to protect your
accessory. In this case, there would be no need to purchase the
Harley Power Point kit, as you would not be using any of its
components.
|
Total Project Cost
|
A little less than
$30 |
| Total Project Time |
Way less than it took to
make this page!!! :-) |
|