Tail Rack
![]()
Rack Bag with a New Twist
| Modifying a Tour Bag to fit a Tail Rack |
|
||||||||
H-D markets a very
nice denier nylon Tour Pack Bag (part No #91587-98) to fit the H-D
Mini Tour Pak Rack, but with a little whittling and a hand full
of hardware, this bag can be modified to fit any flat topped rear
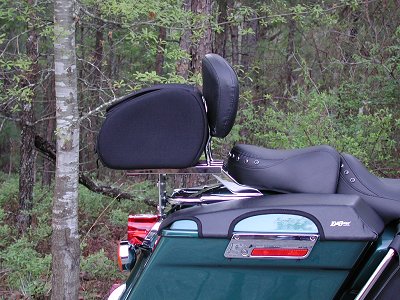
fender rack. The modification below was done so that the bag
would fit on a Four Channel Rack (part No #53341-97) on the back
of a Road King.
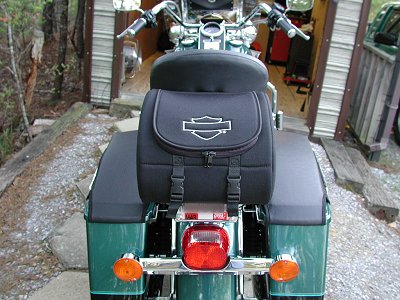
This particular bag has a bit of a tear drop shape to its
profile, and is narrower than the normal "Tour Bag"
offerings from H-D, and it makes a great daily tail rack bag, as
its large zippered opening is super easy to access and it is
large enough to accomodate a half helmet!
|
I'm not sure if this bag is still being manufactured, as it doesn't show up on the H-D Website search and is not in the 2002 Accessory catalog. However, some dealers still have them on the shelves, and they are beginning to show up on E-bay auctions as well, so a bit of scavenger hunting may be required. |
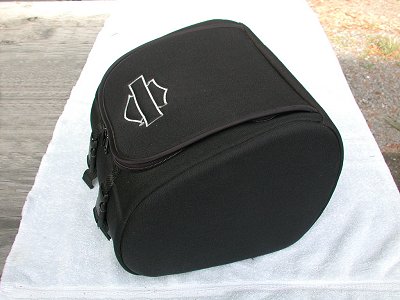 |
BAG Part number # 91587-98 Dubbed "Tour Pak Lid Rack Bag" Suggested retail price is $139.95 I have seen them on E-Bay go for around $70 - $100 with the matching mini rack included!! |
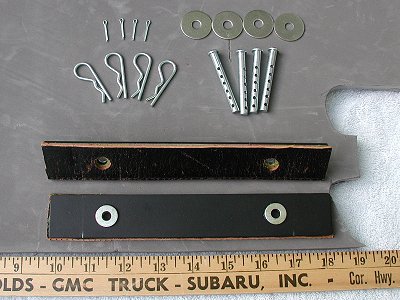
HARDWARE Small
Cotter Pins |
 |
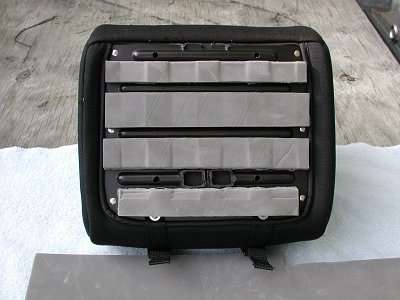 |
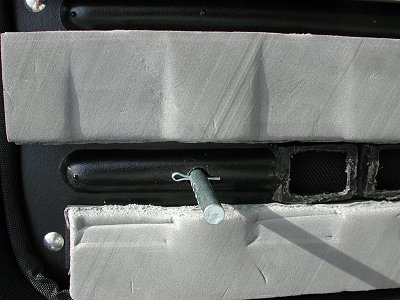
CUT / DRILL / PAD The plastic bottom of the bag has a molded in "hook" on the front (top in photo) and a "Foot" (just above the bottom piece of foam in photo). These have been cut and ground off flush with the base with a dremmel tool, as they would otherwise interfere with mounting the bag on a flat surface. Four holes are drilled through the base, locating the pins in the spaces between the rails of the rack, so that no drilling of the rack is required. Foam Padding is cut into strips and glued to the bottom of the bag. This will serve as a stabilizer and keep pressure on the clevis pins for a nice snug fit and no scratching of the rack. |
| Feed each Clevis Pin and
Fender washer through from the inside of the bag, then
"fix" them to the bag with a small cotter pin. You can see residual depressions in the foam from having had this bag on the bike for a while. |
 |
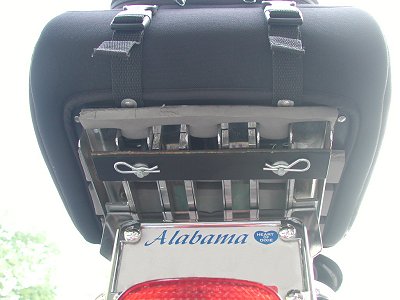 |
The bag is attached by
laying it on the rack, then feeding each of the two metal
strips up onto the clevis pins from underneath the rack (leather
side to the rack), and inserting a hair pin clip in the
closest hole to the metal strip The glued on flat washer adds a little space to the hair pin clip to prevent scratching the paint on the metal and to make it easier to grasp the pin for removal.. HINT: Pressing down on the clevis pin heads from inside the bag will expose a tighter hole past the metal strip and will result in a snug, no shift, fit. |
| The
straps and buckles on the bag serve no purpose here. They
were originally designed for fastening the bag to the H-D
Mini Tour Pak Rack, but they add a little character to
the bag, so I left them in place. |
 |
| Since so
many people ask about the saddlebag covers, I'll go ahead
and put a plug in for my friends at www.ridetek.com They make a perfectly fitting set of saddlebag covers out of weather resistant vinyl with a soft fleece inner surface to protect the paint. If you're more into riding than showing off, these "Lid Covers" are fabulous for keeping down those bumps and scrapes that bags so often have to endure! :-) |
|