Adapting
Harley Bags to the LC
|
Add
Harley Touring Style Hard Bags to your
"Touring LC"
|
|
Swap meets and E-Bay are both excellent sources for
new and used Touring Saddlebags from Harley Davidson. You
can often find brand new "Take off" bags at
tremendous savings over what's currently available for
the LC!
Harley Touring bags have to be supported from the bottom.
On Harley bikes, there is either a large loop frame that
extends down from the fender strut and folds underneath
the bag, or the bag actually sits on a support bar for
the mufflers. The bags are then either bolted or quick
clipped to the fender strut brackets for lateral support.
In order to mount Harley bags on the LC, you will have to
create a bottom support system, and adapt your fender
strut to fit the side holes of the new bags.
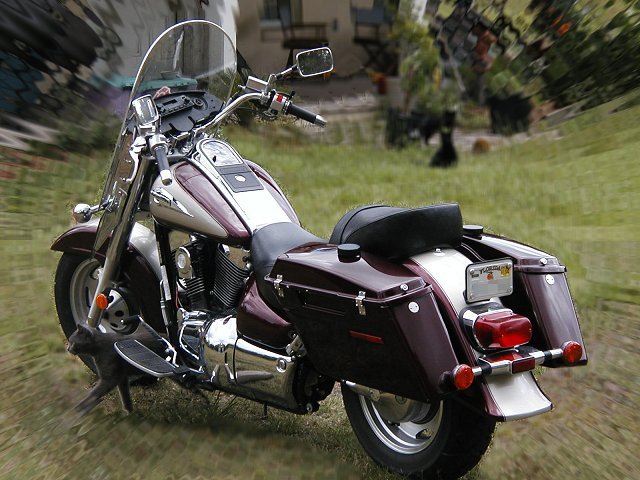
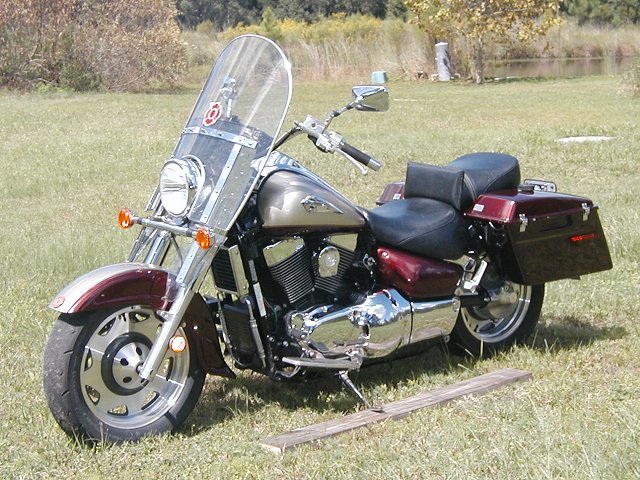
The following is a photo tour of how my cyber friend Tom
Mitchell adapted a set of Harley dresser bags to his LC.
Many thanks to Tom for taking the time to disassemble his
finished setup and record the sequence to share with all
of us! Only the right side is shown. Do the same thing
for the left side, except for the exhaust spacing.
Keep in mind that some of the early models have used the
large loop frames, and these frames are still available
through J&P Cycles. If you have purchased a set of
bags that are setup for the loop frames, you will still
need to create the upper adapter bracket.
Tom used aluminum for his adapter bracket, but since
these bags are large, and capable of carrying more "stuff",
I would recommend that you use steel in your bracket
setup, just to avoid weight bearing and flexion problems
when loaded.
Buy enough 1/8"x 2" wide aluminum (or steel),
to yield two 17" cuts (upper adapter) and two 14"
cuts (lower support). (One for each side. You can trim it
later).
Four metric size 8mm bolts 1/2" longer than your
stock fender strut bolts.
Four bag mounting bolts (unsure of size or length
required) with four matching locknuts, four star washers
and four wing nuts.
Eight large flat fender washers, large enough to fit over
the 8mm bolts
Two short bolts and lock nuts for attaching the support
brackets
LET'S DO IT!!
PHOTO NOTE:
Clicking a photo will take you to a separate
photo album page and display the photo at
640 resolution
|
| 1.)
Place one 17" strip underneath the fender
strut, leaving 3" behind the rear bolt. Mark
the location of both fender strut bolts. |
 |
| 2 & 3.)
Hold the strip even with the bottom of the strut
and mark the height position of the strut bolts. |

 |
| 4.)
Intersect the lines to locate the drilling spot
for the fender strut bolts. |
 |
| 5.) Its
a good idea to mark the adapter strip so that you
don't lose orientation while working with it. |
 |
| 6.)
Drill the holes marked for the fender strut bolts |
 |
| 7.)
Lightly mount the adapter strip to your fender
strut (tape the backside so it doesn't scratch
the chrome strut) |
 |
| 8.)
Place a wooden strips along the top edge of your
upper exhaust pipe to set the proper height of
the bag, making sure that its side mounting holes
will fall somewhere on the adapter strip. (The
photo is with V&H pipes and uses two 1"
strips of wood for spacing. Your setup may vary) |
 |
| 9.)
Slide the bag back on the strips of wood until it
touches the turn signal. (Turn signals will be
spaced back later), open the lid and mark the
side mounting hole locations on the adapter strip. |
 |
| 10.)
Remove the adapter and drill the side mount holes.
(As an alternative, Harley's quick disconnect
brackets could be mounted here, but that will
create additional spacing out of the bags, and
may get a bit too wide for good aesthetics) |
 |
| 11.) New
fender strut bolts and washers |
 |
| 12.)
Install two bag mounting bolts from the inside
face of the strip, and secure them with locknuts. |
 |
| 13 & 14.)
Use four fender washers behind each new fender
bolt to space the adapter strip out away from the
fender strut. This will allow clearance for the
bag mounting bolt heads. |

 |
| 15.)
This is how the adapter should look. Now drill a
hole for the support bracket approx 7.5"
forward of the rear fender bolt. |
 |
| 16, 17 &
18.) Align the support strip to the adapter
strip and mark for attaching bolt hole location. |


 |
| 19.) Put
the support strip in a vise and bend it about 2
degrees out from just beneath the bolt hole. Bolt
the support strip to the adapter, then put the
bag on, and mark the location of the bottom of
the bag to the support strip for the final bend. |
 |
| 20.)
Remove the support strip and make the last bend
to go under the bag approx 40 degrees (you can
adjust the degrees later). |
 |
| 21.)
This is what it should look like. |
 |
| 22 & 23.)
Bolt the support strip on the adapter strip and
add washers to the bag mounting bolts for spacing.
The 2 degree bend in the support bar will give it
some shock absorbing ability. |

 |
| 24, 25 &
26.) Place the bag on the support and add
fender washers and nuts to the bag mounting bolts
(note: using star washers and wing nuts here will
make quick, no tools removal of the bags for
cleaning and maintenance) |


 |
| 27.) If
needed, you can space back your turn signal bar
by adding washers to its mounting bolts |
 |
Mocc Note: Tom doesn't show this, and I'm not
sure if he did it, but I would recommend also installing
a "fixing" bolt to the bottom of the bag,
through the support strip, if you bags are flat bottomed,
or if your bags have a cradle under bottom, you can split
a section of broom handle and woodscrew it to the support
strip at a point where it meets the cradle, then cover it
with rubber. This will prevent the bottom of the bag from
sliding around and give a bit more support.
This adapter bracket will also work with the leather
covered Road King Classic bags from Harley.
Thanks again to my friend Tom
Mitchell for the time and effort to share this
information.
|
|